If you're like me your skin gets extra dry and itchy this season because of the cold winter air. Here's a quick tip to keep warm and hydrated. When you take your shower and you're about ready to get out, gradually lower the temperature of your water until it's almost completely cold. This will get your blood flow going, insuring to regulate the temperature of your body and it will lessen the shock of getting out of the shower. It's also a sure wake me up for those mornings where there's not a lot of sunlight when you wake up.
You can also use a cream based lotion instead of regular lotion that will keep the skin hydrated longer. I use a shea butter cream or coconut oil in the winter. Hope this helps.
Showing posts with label beauty. Show all posts
Showing posts with label beauty. Show all posts
Monday, December 3, 2012
Monday, November 19, 2012
Homemade Vodka tea lemon toner
So if you're like me you start out the day with beautiful glowing skin and by mid-day you look like someone's slapped a chicken all over it. That's okay, you're not alone. Although buying a combination-skin moisturizer is a very good first step, you most likely need to take others. Which is why I've researched a very fun, innovative approach to taming oily skin.

4 tablespoons of Rose hips tea (or a blend that contains it)
4 tablespoons of Lemon juice
4 tablespoons of aloe vera gel
2- With a cotton ball, apply the toner to your face, after cleaning and before moisturizing.
3- Store your toner in the refrigerator as it will help with conservation (a few weeks) and with the tightening of your pores because of the colder temperature
- Rose hips tea: is also astringent as it has a very high concentration of Vitamin C and helps protect your skin from damage as it contains antioxidants
- Lemon juice: The antibacterial properties makes it perfect to combat acne and it will exfoliate your skin to remove the excess oils
- Aloe vera: will keep the skin hydrated and will prevent the burning sensation of the toner being too concentrated with astringents. It also helps heal scars.
This recipe is pretty straight forward but maybe this video tutorial can help:
Youtube video tutorial

Vodka tea lemon toner
4 tablespoons of Russian vodka4 tablespoons of Rose hips tea (or a blend that contains it)
4 tablespoons of Lemon juice
4 tablespoons of aloe vera gel
How it works
1- Mix all of the ingredients and place in a clean, dry container. The measurements gave me enough toner for a 60ml bottle2- With a cotton ball, apply the toner to your face, after cleaning and before moisturizing.
3- Store your toner in the refrigerator as it will help with conservation (a few weeks) and with the tightening of your pores because of the colder temperature
Why it works
- Vodka: is an astringent, we're just not used to thinking about alcohol for beauty related purposes. It works the same way as vinegar.- Rose hips tea: is also astringent as it has a very high concentration of Vitamin C and helps protect your skin from damage as it contains antioxidants
- Lemon juice: The antibacterial properties makes it perfect to combat acne and it will exfoliate your skin to remove the excess oils
- Aloe vera: will keep the skin hydrated and will prevent the burning sensation of the toner being too concentrated with astringents. It also helps heal scars.
This recipe is pretty straight forward but maybe this video tutorial can help:
Youtube video tutorial
Tuesday, November 13, 2012
Homemade turmeric face mask
Is it just me or most Indian women are gorgeous?! This is why this next recipe was inspired by an Indian tradition. This recipe is traditionally used on brides to be before the wedding. It basically helps to prevent breakouts, fights acne, blemishes and dark spots.

1 Tablespoon of Turmeric Powder
2 Tablespoons of Milk
1 Teaspoon of Honey
 Notes:
1- I could not find any Gram flower so I simply ground Chick peas with the Magic Bullet and I passed them through a strainer for finer grains.
2- Apply the mask over the bathroom counter as this can be quite messy.
3- It's normal for the face to feel stiff after a few minutes as the mask hardens.
4- It's recommended to do this mask no more than twice a week
5- If you need anymore help or you're more visual, check out this video tutorial:
Youtube video tutorial

Turmeric Face Mask
1 Tablespoon of Gram flour also know as Chickpea flour1 Tablespoon of Turmeric Powder
2 Tablespoons of Milk
1 Teaspoon of Honey
Directions
Put all of the ingredients in a bowl and mix well until you get a pasty consistency. Apply on your face and be careful not to get any in your eyes. Let it sit for about 20 minutes, then rinse with warm water and towel dry.
1- I could not find any Gram flower so I simply ground Chick peas with the Magic Bullet and I passed them through a strainer for finer grains.
2- Apply the mask over the bathroom counter as this can be quite messy.
3- It's normal for the face to feel stiff after a few minutes as the mask hardens.
4- It's recommended to do this mask no more than twice a week
5- If you need anymore help or you're more visual, check out this video tutorial:
Youtube video tutorial
Friday, November 2, 2012
Homemade flax seed hair gel recipe
I've been looking for an alternative for store bought gels, that either flake or make my hair sticky and yuk because I have to use so much and I came across this recipe on Youtube but made a few changes to make it my own and ensure that it would have optimal results on my hair

2 cups of water
1 tablespoon of aloe vera gel
1 tablespoon of vegetable glycerin
1 teaspoon of argan oil or argan oil treatment
5 drops of Vitamin E
1 pantyhose (to use as a strainer)
2- Wait a couple of minutes until a gooey film develops on the top of the pan; that's when you know to turn off the oven
3- Place the pantyhose over a container so that the gel passes through the hose but the seeds stay in the pantyhose
4- Let the gel cool down before adding the other ingredients
5- After mixing them all together, place the gel into dry, sterilized containers. Since this needs to be kept in the fridge for conservation; I placed some in a bottle and the rest in a bigger container. The gel is a little runny so it's better to use it from the bottle. You can even use it in a spray bottle
6- Keep the seeds in a separate container as you can reuse them for another batch.
Note that you can do this recipe just with the first 2 ingredients. The gel is great for styles like twist outs, braid outs and does not dry out the hair. Also, it's inexpensive since a bag of about 500g of flax seed will cost you about 5$ and you need about 50g per recipe that you can reuse at least once so you can have for about 0,25$ you can make a batch. You can keep each batch in the fridge for up to 3 weeks.

Moisturizing Flax seed gel
1/4 cup of flax seeds2 cups of water
1 tablespoon of aloe vera gel
1 tablespoon of vegetable glycerin
1 teaspoon of argan oil or argan oil treatment
5 drops of Vitamin E
1 pantyhose (to use as a strainer)

Step by step guide
1- Bring the water and flax seeds to boil all the while stirring2- Wait a couple of minutes until a gooey film develops on the top of the pan; that's when you know to turn off the oven
3- Place the pantyhose over a container so that the gel passes through the hose but the seeds stay in the pantyhose
4- Let the gel cool down before adding the other ingredients
5- After mixing them all together, place the gel into dry, sterilized containers. Since this needs to be kept in the fridge for conservation; I placed some in a bottle and the rest in a bigger container. The gel is a little runny so it's better to use it from the bottle. You can even use it in a spray bottle
6- Keep the seeds in a separate container as you can reuse them for another batch.
Note that you can do this recipe just with the first 2 ingredients. The gel is great for styles like twist outs, braid outs and does not dry out the hair. Also, it's inexpensive since a bag of about 500g of flax seed will cost you about 5$ and you need about 50g per recipe that you can reuse at least once so you can have for about 0,25$ you can make a batch. You can keep each batch in the fridge for up to 3 weeks.
Enjoy!
Thursday, November 1, 2012
Exfoliating Sugar and honey scrub recipe
Exfoliating is an important part of a good beauty routine as it allows regeneration of the skin while getting rid of yukky dead skin cells. This little recipe is simple and effective to leave your skin feeling smooth and hydrated 
1/4 cup of brown sugar
2 tablespoons of extra virgin olive oil
1 tablespoon of sweet almond oil
15 drops of jojoba oil
1 teaspoon of honey
1 teaspoon of cinnamon
Mix all the ingredients in a bowl and store in a clean dry container. Do not let water come in contact with your mix as it will cause bacteria to form. You can use this on your elbows, knees and even for mani/pedis and it's good for up to 6 months

Sugar honey scrub
1/4 cup of sugar1/4 cup of brown sugar
2 tablespoons of extra virgin olive oil
1 tablespoon of sweet almond oil
15 drops of jojoba oil
1 teaspoon of honey
1 teaspoon of cinnamon
Mix all the ingredients in a bowl and store in a clean dry container. Do not let water come in contact with your mix as it will cause bacteria to form. You can use this on your elbows, knees and even for mani/pedis and it's good for up to 6 months

Sugar facial
To use this as a facial, simply lather your face with soap using warm water (if you have oily skin add lemon to the water) and add a nickel sized piece of scrub on your face. Gently massage in circular motions for about 10 minutes. Rinse off using cool water to close pores. Pat your face dry with a towel and use your favorite moisturizer.Monday, October 29, 2012
Braids and protective styles
Is it just me or it's great to give your hair a break from the elements in the fall/winter months?! So if like me you like wearing braids for that reason or even just to mix it up; contact me. I have good prices and I can do multiple styles if you live in the Montreal area. Here are some of my latest clients:


Contact me at marieconstant84@hotmail.com for an appointment. Let me know in advance and I can even style your hair on a week day. See you soon


Contact me at marieconstant84@hotmail.com for an appointment. Let me know in advance and I can even style your hair on a week day. See you soon
Friday, October 26, 2012
Banana baby food Homemade Deep conditioner
It is just me or I've been using a lot of food on my hair lately? I just figure, I've stopped using the chemical relaxers, I might as well try to use as less chemicals on my hair as possible! I still use store bought products but I'm experimenting with what nature has to offer right now and it's great. It's inexpensive and fun. So for about 1$ I came up with this little recipe that's sure to:
 1- Make my hair softer: Bananas are rich in potassium and Vitamin C which help soften and hydrate the hair
2- Give my hair bounce and shine: thanks to the olive and coconut oil
3- Help my hair grow: The sulfur and zinc contained in garlic stimulates hair growth
Banana Deep-conditioner
1 bottle of banana baby food
2 tablespoons of honey
1 tablespoon of virgin coconut oil
1 tablespoon of "garlicky" olive oil --> Crush 2 garlic clovers and let them sit in the heated olive oil for 2-3 days. Sift out the garlic pieces and only keep the olive oils for the mask. You can keep the oil in the fridge for 10 days [Source Journalnappygirl.com]
Mix all of the ingredients together and apply the mask on clean (washed hair). Place a plastic cap on your head and let it sit for at least 30 minutes. Rinse abundantly. Then use regular conditioner.
***Important***: Garlic is counter-indicated for people that are on anticoagulant drugs such as aspirin. Also, do not add the garlic to the recipe if you have soars or cuts on your head as it will "burn". The overwhelming garlic smell dissipates after a few hours
If you try any of the recipes, please let me know what the results are for you :)

2- Give my hair bounce and shine: thanks to the olive and coconut oil
3- Help my hair grow: The sulfur and zinc contained in garlic stimulates hair growth
Banana Deep-conditioner

1 bottle of banana baby food
2 tablespoons of honey
1 tablespoon of virgin coconut oil
1 tablespoon of "garlicky" olive oil --> Crush 2 garlic clovers and let them sit in the heated olive oil for 2-3 days. Sift out the garlic pieces and only keep the olive oils for the mask. You can keep the oil in the fridge for 10 days [Source Journalnappygirl.com]
Mix all of the ingredients together and apply the mask on clean (washed hair). Place a plastic cap on your head and let it sit for at least 30 minutes. Rinse abundantly. Then use regular conditioner.

***Important***: Garlic is counter-indicated for people that are on anticoagulant drugs such as aspirin. Also, do not add the garlic to the recipe if you have soars or cuts on your head as it will "burn". The overwhelming garlic smell dissipates after a few hours
If you try any of the recipes, please let me know what the results are for you :)
Thursday, October 25, 2012
Homemade fruit face mask and juice recipe
Is it just me or sometimes the face needs a little pick me up... In the same period that I was doing the organic garden in our backyard I was introduced to juicing. So here's a simple juice recipe that tastes great and instead of throwing away the pulp, you can use it as a natural facemask/scrub. I left it on for about 10 minutes before rinsing. The results: tingly freshness + extra smooth skin. 
I use fruits and veggies in my juices to maximize the benefits without compromising the taste so this is my recipe for "Yellow juice". All you have to do is put all of the ingredients in the juicer and enjoy.
Yellow juice
2 apples
1 orange
1 pineapple
1 peach
1/2 celery

I use fruits and veggies in my juices to maximize the benefits without compromising the taste so this is my recipe for "Yellow juice". All you have to do is put all of the ingredients in the juicer and enjoy.
Yellow juice
2 apples
1 orange
1 pineapple
1 peach
1/2 celery
Tuesday, October 23, 2012
Homemade deep conditioner recipes
Is it just me or the elements sometimes have your hair feeling dry and brittle? These recipes will be sure to restore moisture and shine to your hair. You should try doing them at least once a month.
Avocado based or Mayo based
- 1/2 Avocado (ripe) or 4 tablespoons of mayonnaise
- 2 tablespoon coconut oil
- 1 tablespoon extra virgin olive oil (or another oil of your choice, I use sweet almond oil)
- 1 tablespoon honey
1- Place all the ingredients in the blender until you get a paste-like consistency
2- After shampoo and conditioner, apply the deep-conditioner from roots to ends of all your hair
3- Put on a plastic cap and let it rest for at least an hour
4- Rinse abundantly with warm water and use leave-in treatment
Avocado based or Mayo based
- 1/2 Avocado (ripe) or 4 tablespoons of mayonnaise
- 2 tablespoon coconut oil
- 1 tablespoon extra virgin olive oil (or another oil of your choice, I use sweet almond oil)
- 1 tablespoon honey

1- Place all the ingredients in the blender until you get a paste-like consistency
2- After shampoo and conditioner, apply the deep-conditioner from roots to ends of all your hair
3- Put on a plastic cap and let it rest for at least an hour
4- Rinse abundantly with warm water and use leave-in treatment
5 natural (curly) hair essential products
Is it just me or being a natural comes with some prerequisites. First off, you have to learn a new linguo: twa, bantu knots, twistouts, prepoo, cowash. It gets really confusing real fast. Also, there's these rules to follow and stuff that they tell you you must have in order to have the beautiful, long, curly hair you've always wanted to have. Since I've been natural for a few months now I'm going to let you newby naturalistas in on my Top 5 curly hair essentials:
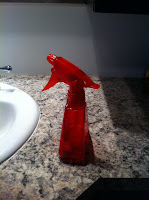 #1 Water spritzer bottle
This tool is great since our naturally curly hair is dryer and needs lots of hydration. It's also practical to have when you're styling your hair to spray a little bit of water before sealing with your leave-in conditioner or styling product. I have personally did a variant of this by mixing 1/4 of vegetable glycerin, 1/4 aloe vera gel, 1/2 water and a few drops of mint leaf oil.
#2 Vegetable and essential oils
They are your go to guys for moisture and growth strategies. My personal favorites are:
- Coconut oil: It deeply penetrates the body of the hair to make it shiny and resilient. It can be used as a prepoo (treatment to do before you shampoo your hair) as shampoo strips the hair from its natural oils. It can also be used for DIY deep-conditioners. I'll post a recipe in the next entry.
- Sweet almond oil: It nourishes the hair and prevents dandruff
- Mint leaf oil: It promotes hair growth and has a nice smell #3 Satin cap/ scarf/ pillow case
Curly hair has extravagant taste and therefore you should not sleep with cotton pillow cases or head scarves!!! I kid, the actual reason why you should prefer satin to cotton is because the cotton will absorb the moisture from the hair and we've already established curly hair craves it. When I first eard this I ran to a hair supply store to get these and realized they sold the satin caps for 5$ so I went to the dollar store and bought a satin shower cap. After I scissored out the plastic interior lining, it became a good old satin cap that I had payed a fraction of the price for!!! I love DIY projects and saving money!
 #4 Wide-tooth comb (or pick)
This tool is perfect for detangling your hair in a gentle enough way that you don't pull out all of your hair. I picked this type because it has a handle which I find practical but there are different types out there. Find out what works for you. It is not the priority since detangling your hair with your fingers is simple and efficient. It's also better for avoiding breakage.
#5 Sulfate-free shampoo
Harsh chemicals like these make the hair dry and brittle so avoid them. There are plenty of curly friendly lines out there were you can find a great shampoo that won't be too harsh on your hair.

This tool is great since our naturally curly hair is dryer and needs lots of hydration. It's also practical to have when you're styling your hair to spray a little bit of water before sealing with your leave-in conditioner or styling product. I have personally did a variant of this by mixing 1/4 of vegetable glycerin, 1/4 aloe vera gel, 1/2 water and a few drops of mint leaf oil.
#2 Vegetable and essential oils
They are your go to guys for moisture and growth strategies. My personal favorites are:
- Coconut oil: It deeply penetrates the body of the hair to make it shiny and resilient. It can be used as a prepoo (treatment to do before you shampoo your hair) as shampoo strips the hair from its natural oils. It can also be used for DIY deep-conditioners. I'll post a recipe in the next entry.
- Sweet almond oil: It nourishes the hair and prevents dandruff
- Mint leaf oil: It promotes hair growth and has a nice smell

Curly hair has extravagant taste and therefore you should not sleep with cotton pillow cases or head scarves!!! I kid, the actual reason why you should prefer satin to cotton is because the cotton will absorb the moisture from the hair and we've already established curly hair craves it. When I first eard this I ran to a hair supply store to get these and realized they sold the satin caps for 5$ so I went to the dollar store and bought a satin shower cap. After I scissored out the plastic interior lining, it became a good old satin cap that I had payed a fraction of the price for!!! I love DIY projects and saving money!

This tool is perfect for detangling your hair in a gentle enough way that you don't pull out all of your hair. I picked this type because it has a handle which I find practical but there are different types out there. Find out what works for you. It is not the priority since detangling your hair with your fingers is simple and efficient. It's also better for avoiding breakage.

#5 Sulfate-free shampoo
Harsh chemicals like these make the hair dry and brittle so avoid them. There are plenty of curly friendly lines out there were you can find a great shampoo that won't be too harsh on your hair.
Monday, September 17, 2012
Black women reverting to natural hair
I myself have stopped putting perm 4 months ago because: 1- It burnt my scalp almost every single time it was applied (but I was trying to be strong feeding myself with the you have to suffer to be beautiful non-sense) 2- I was trying to lead a healthier lifestyle so it was kinda incoherent for me to continue applying harsh chemicals to my hair) 3- I was a bit influenced by the whole movement (i have to admit watching pics of #teamnatural sisters on Instagram I was inspired to try something new: deal with my natural hair) So I shaved it all off, and I must say it was an empowering moment.  If you have taking the same decision to big chop (cut your permed ends in order to only have your curly hair left) I would like to congratulate you !!!! You did a BOLD move. BUT, I think you have to be aware of the repercussions in the way that others' perception of you might change. Your colleagues, family or even loved one might not love your drastic hair cut as much as you do! You must remember why you took that decision and why it was the right one for YOU. Weather it be health [perms are being linked to uteran cancers for African American women], values or even reconnecting with your roots be confident that you made the right choice. Also, it is nice to have someone who supports you in your decision to help you ease into the transition and make you feel comfortable. It might also be nice to have someone who can answer your questions as caring for natural hair is a whole other ball park than it is for permed hair. There are tons of instruction videos on Youtube and communities on Facebook. Joining just one of those is fine to start because the info can be overwhelming (sometimes to much is like not enough). My personal advice is if you've just big chopped, enjoy those first couple of low-maintenance months where you can just wash-and-go and maybe sometimes have a brush run through your hair, soon after you'll ear about bantu-knots and twist outs and protective style and WHOA, this is getting kind of complex!!! But don't worry, it will take you a few months before you can start to think about doing any of that so don't worry, you'll get there. Relax and enjoy the journey. I know I have mine!


Subscribe to:
Posts (Atom)